You don’t need to be a designer. You don’t need expensive software or an art degree gathering dust. You need an idea — and the willingness to see it through from the back of a napkin to something you can actually peel and stick.
Most people who want to make a custom sticker talk themselves out of it before they even begin. They assume it requires skills they don’t have, tools they can’t afford, or a level of polish beyond them. None of that is true. The gap between having an idea for a sticker and holding that sticker in your hands is smaller than it has ever been — and this guide exists to walk you across it.
Whether you want to make one sticker for yourself, a small batch for gifts, or the start of something you plan to sell, the process begins the same way: with a thought worth putting on something.
Start With the Feeling, Not the Design
The most common mistake beginners make is jumping straight to the visual before deciding what the sticker actually feels like. They open a design tool, stare at a blank canvas, and freeze. It is not a design problem. It is a clarity problem.
Before you touch any software, ask yourself one question: when someone sees this sticker, what do you want them to feel? Warm and nostalgic? Bold and a little defiant? Playful and silly? Calm and minimal? The answer to that question will guide almost every decision that follows — the colors, the shape, the font, the level of detail.
Write it down in one sentence. Something like: “I want this to feel like a quiet joke between my closest friends and me.” Or: “I want this to look handmade and a little imperfect, like something from a market stall.” That sentence is your brief. It is worth more than any tutorial on kerning or color theory when you are just starting.
Where Ideas Actually Come From
People wait for inspiration as though it is a weather event — something that arrives on its own schedule and cannot be hurried. In sticker design, as in most creative work, that is not how it goes. Ideas come from paying attention to the specific.
The specific thing you say when something goes wrong that always makes your friends laugh. The exact shape of your cat when she sits in the window. The phrase your grandmother used that you have never heard anyone else say. The name of the road you grew up on. The inside of the coffee shop where you wrote your dissertation. These are not just memories — they are sticker ideas. They are already images waiting to be drawn.
“The best sticker ideas are the ones too specific to be anyone else’s. That specificity is the whole point.”
If you are designing for a brand or a product rather than something personal, the same logic applies. What is the one thing about your business that no competitor could claim? What image or phrase captures something true about what you make or who you make it for? Start there. Specific always beats general.
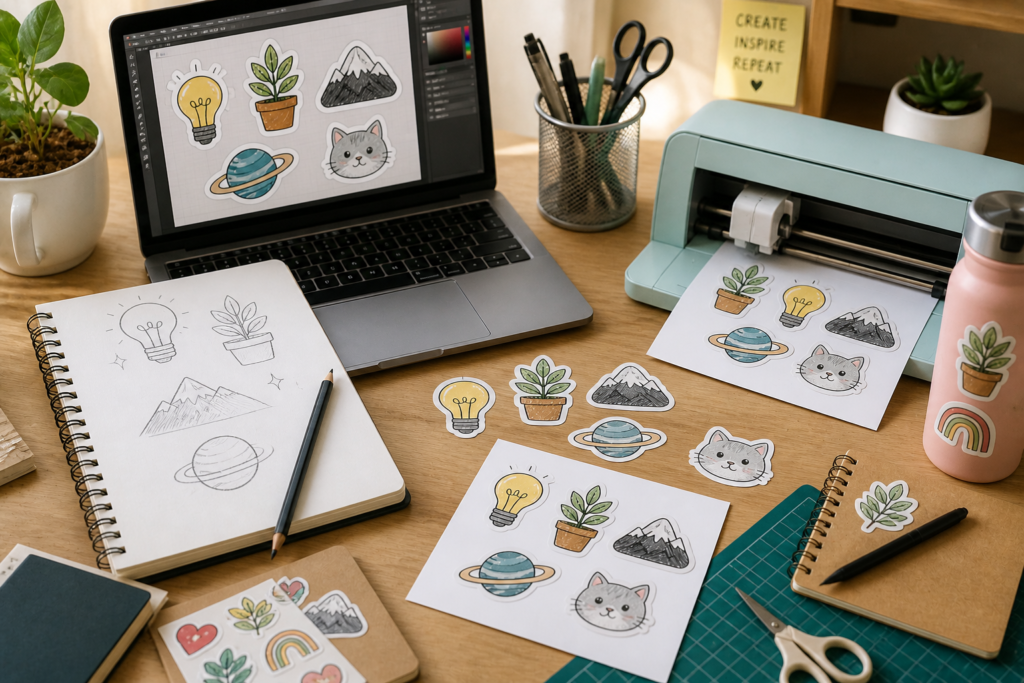
Sketching Before Screens
This step gets skipped constantly, and it is a mistake every time. Before you open any app or website, draw your idea on paper. It does not need to be good. It does not need to be clean. You are not making the final sticker — you are giving your hands permission to think.
A rough pencil sketch, even a terrible one, does something important: it forces you to make decisions. How big is the text compared to the image? Is the sticker round, square, or die-cut around the shape? Is there a border, or does the design float freely? These are questions that feel abstract on a screen and suddenly become obvious the moment you hold a pen and draw the actual shape with your actual hand.
Spend ten minutes with a piece of paper before you open anything else. You will save yourself an hour of aimless clicking later.
Choosing the Right Tool for Where You Are
Design tools range from completely free and simple to powerful and expensive, and for a beginner, starting anywhere but the simple end is a waste of time and energy. You do not need Illustrator. You do not need Photoshop. You do not need to learn what a vector file is in the first week.
Canva is where most beginners feel at home. It is free for core features, works in a browser, offers thousands of font options, and lets you move elements intuitively without needing to understand layers or anchor points. For a first sticker — especially one that is mostly text or a simple shape — it is genuinely all you need.
If you want to work with hand-drawn illustrations, a phone app like Procreate (for iPad) or even the basic drawing tools in Adobe Fresco get you surprisingly far. Draw your design, export it as a PNG with a transparent background, and you have a file ready to send to a printer. The transparent background matters—it tells the printer where your design ends and where the sticker’s cut line should be.
As your confidence grows, tools like Affinity Designer or Inkscape give you more control without the subscription cost of the Adobe suite. But none of that is for week one. Week one is about finishing something, not perfecting it.
The Things That Actually Make a Sticker Look Good
You do not need to study design formally to make a sticker that looks intentional and well-made. There are a handful of things that separate a sticker that looks considered from one that looks thrown together, and none of them require advanced skills.
Pick one font and use it—two at most — one for the main text, one for a secondary detail. The moment you start mixing three or four typefaces on a small surface, it reads as chaotic rather than creative. Similarly, limit your colors. A sticker with two or three colors that work together will always look sharper than one with six that don’t quite agree.
Give your design breathing room. One of the most common beginner mistakes is filling every corner of the sticker with something. White space — the empty area around and between design elements — is not wasted space. It is what lets the eye rest and makes the important parts feel important. A design that has room to breathe looks confident. One that is crammed to the edges looks anxious.
And size your text for the real world, not the screen. A sticker that looks great at full zoom on your laptop can become completely illegible when printed at two inches wide. Print a test version on regular paper before you commit to anything. Tape it to the actual surface you plan to use it on. Look at it from the distance it will normally be seen from. You will immediately spot what needs to change.
Getting It Printed: What to Know First
Once your design is ready — or ready enough, because at some point you have to let it go — the question becomes where and how to print it. The options have expanded enormously in the last few years, and prices have dropped accordingly.
Online print services let you upload a file, choose a material and finish, pick a quantity, and receive your stickers in the post within a few days. Matte finishes feel softer and less glossy — good for a handmade or organic aesthetic. Gloss finishes are vibrant and eye-catching — better for bold, graphic designs. Kiss-cut stickers are cut to the outline of your design, leaving the backing sheet intact, making them easy to peel. Die-cut stickers are cut all the way through the design’s shape, with no extra border — they look clean and intentional on any surface.
Order a small quantity first. Ten or twenty stickers are enough to see how your design translates from screen to print, check the colors, test the size, and decide whether you want to make any changes before ordering more. Every designer, regardless of experience, runs a test. It is not a sign of uncertainty — it is just common sense.
“The first print is not the final product. It is the most useful piece of feedback you will ever get on your design.”
The Permission You Were Waiting For
If you have read this far and you still have not started, the only thing standing between you and your first custom sticker is a decision. Not a skill gap. Not a missing tool. Not a better idea waiting somewhere in the future. Just the decision to begin with what you already have — a thought, a feeling, a thing worth putting on something.
The first one will not be perfect. That is not the point of the first one. The point is to make it, hold it, stick it somewhere, and know that it came from you. Everything that comes after that is practice getting better at something you already know how to do.
So grab a piece of paper. Write down the one thing you keep meaning to make into a sticker. Draw it badly. Open the free tool. Start.
For every idea that has been sitting in the back of your head waiting for you to give it a shape.
Leave a Reply